Introduction
Thank you for your interest in the VRTCAL Android SDK.
Sign up for an account to monetize with Vrtcal.
Technical Support
Need help? Please email us at support@vrtcal.com.
You can also find helpful information at https://www.vrtcal.com
Table of Contents
- Minimum Requirements
- Get Started
- Showing Banner Ads
- Showing Interstitial Ads
- Showing Digital Audio (DAAST) Ads
- Native Ads
- Important Notes
- ProGuard
- GDPR
- MRAID
- Ad Mediation (VRTCAL to Google SDKs [AdMob/GAM])
- Ad Mediation (Google SDKs [AdMob/GAM] to VRTCAL)
- Ad Mediation (VRTCAL to IronSource)
- Ad Mediation (IronSource to VRTCAL)
- Ad Mediation (VRTCAL to AppLovin)
- Ad Mediation (AppLovin to VRTCAL)
- Ad Mediation (VRTCAL to Fyber-FairBid)
- Ad Mediation (VRTCAL to Fyber-Marketplace)
- Ad Mediation (VRTCAL to Smaato)
- Ad Mediation (VRTCAL to Tapjoy)
- Ad Mediation (VRTCAL to Vungle)
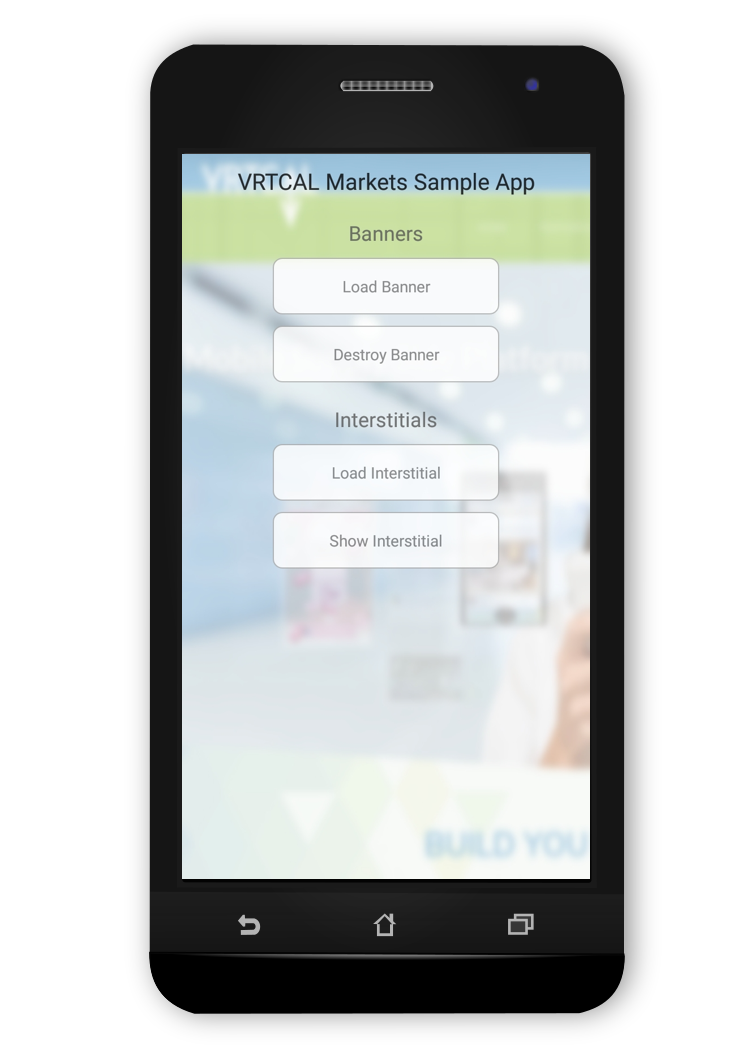
- Sample App
- Appendices
- How to Enable Location Update
- FAQ
Minimum Requirements
SDK Size: 150K
Average Memory Footprint: <10MB
Our SDK is supported on API Level 19 (Android 4.4) and above.
The minimum required permissions are INTERNET, ACCESS_WIFI_STATE, and ACCESS_NETWORK_STATE, which are automatically added. Additional permissions are needed for optional features such as location services, third-party mediated ads, and MRAID ads. See their corresponding sections for more instructions.
Get Started
Download the SDK
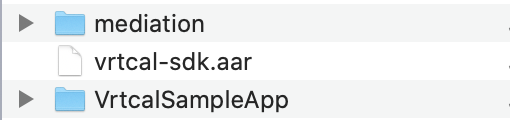
Download our SDK from https://ui.vrtcal.com/sdk_downloads/VRTCALSDK_Android_2_1_7.zip and unzip the file. The resulting vrtcal-sdk directory will have the following files:
Project Configuration
Add vrtcal-sdk.aar to your app
- Copy vrtcal-sdk.aar to your project’s libs directory <proj>/app/libs.
- Open <proj>/app/build.gradle and add the following line to the dependencies section:
 dependencies {
     [Other dependencies...]
     implementation(name: 'vrtcal-sdk', ext: 'aar')
 }
You might also need to add:
repositories { flatDir { dirs 'libs' } } - Starting from Android 8, clear HTTP traffic is no longer allowed by default. However, some ads still use the non-secure HTTP protocol. To allow these ads to display properly, allow clear HTTP traffic by following instructions on Android Developer’s page https://developer.android.com/training/articles/security-config.:
- For better ad targeting, we recommend that you do the following optional steps:
- Include the following dependency in <proj>/app/build.gradle, so that ad personalization opt-out preference can be read:
dependencies { [Other dependencies...] implementation(name: 'vrtcal-sdk', ext: 'aar') implementation 'com.google.android.gms:play-services-ads-identifier:17.0.0' } - Enable location updates by following instructions on Google Developers page https://developer.android.com/training/location. You can enable either FINE or COARSE location. You only need to include location libraries and add the permissions–your app does not need to request location updates, as our SDK will take care of that. For quick and simplified instructions, see Appendices: How to Enable Location Updates section.
- Include the following dependency in <proj>/app/build.gradle, so that ad personalization opt-out preference can be read:
- Import required classes in the Java class where you will be requesting ads, typically MainActivity.java:
import com.vrtcal.sdk.*;
Initialize SDK
Before making ad requests you must initialize our SDK, as follows:
VrtcalSdk.init(context, appId, new VrtcalSdkListener() {
    @Override
    public void onSdkInitialized() {
        // SDK successfully initialized
    }

    @Override
    public void onSdkFailedToInitialize(Reason reason) {
        // SDK failed to initialize
    }
});
App ID can be obtained by adding an app in the SDK Management Section and following the instructions here. VrtcalSdkListener is the listener for SDK event callbacks. We recommend that you make this call as early as possible to avoid delays later in ad requests. A good place to call this is in your Activity’s onCreate() function.
Setting UnifID Identity Management Data (Optional)
We support email and phone number data types. Use the following to set user email:
VrtcalSdk.setPiiData(PiiDataType.EMAIL, "user_mail"); To set user phone number, use the following (you can use any phone number format, since the SDK will take care of cleaning up the string):
VrtcalSdk.setPiiData(PiiDataType.PHONE_NUMBER, "user_phone_number"); You should only set either email or phone number. Invoking the above API again will override the previous value. Ideally, you should call it before your first ad request.
Showing Banner Ads
Create banner
Create a banner by instantiating a VrtcalBanner view:
VrtcalBanner banner = new VrtcalBanner(context);You can also define your VrtcalBanner view in XML layout file and inflate it in your Activity.
Configure banner
You can listen to ad events by setting ad listener, as follows:
banner.setAdListener(new VrtcalBannerListener() {
    @Override
    public void onAdLoaded(VrtcalBanner banner) {
    }

    @Override
    public void onAdFailed(VrtcalBanner banner, Reason reason) {
    }

    @Override
    public void onAdClicked(VrtcalBanner banner) {
    }

    @Override
    public void onAdVideoStarted(VrtcalBanner banner) {
    }

    @Override
    public void onAdVideoCompleted(VrtcalBanner banner) {
    }
});
When overriding ad listener methods, you only need to override the ones you are interested in. For onAdFailed() callback, the SDK provides a reason that could aid in debugging why an ad request failed. The onAdVideoStarted() and onAdVideoCompleted() callbacks are only applicable to VAST ads. If you have video content in your app, you should pause your video when onAdVideoStarted() is called to avoid conflicts. You can resume playback when onAdVideoCompleted() is invoked. If you reload banners manually to maximize ad revenue, the onAdVideoCompleted() callback can be used as a good indication that the ad has completed and thus is a good time to load a new banner.
Load banner and add banner to UI
Load and show the banner with the following call (the example assumes you already have a ViewGroup called bannerContainer):
banner.loadAd(adUnitId)
ViewGroup bannerContainer = findViewById(R.id.bannerContainer);
bannerContainer.addView(banner);
Ad Unit ID can be obtained by creating an Ad Unit in the SDK Management Section by following the instructions here, then you can use any Ad Unit ID in test mode for testing.
Destroy banner
When the banner is no longer needed, destroy it and remove it from UI:
((ViewGroup) findViewById(R.id.bannerContainer)).removeView(banner);
banner.destroy();
banner = null;
This will free up resources used by the banner.
Showing Interstitial Ads
Create interstitial
Create an interstitial by instantiating a VrtcalInterstitial object:
VrtcalInterstitial interstitial = new VrtcalInterstitial(context);Configure interstitial
You can listen to ad events by setting ad listener, as follows:
interstitial.setAdListener(new VrtcalInterstitialListener() {
    @Override
    public void onAdLoaded(VrtcalInterstitial interstitial) {
    }

    @Override
    public void onAdFailedToLoad(VrtcalInterstitial interstitial, Reason reason) {
    }

    @Override
    public void onAdShown(VrtcalInterstitial interstitial) {
    }

    @Override
    public void onAdFailedToShow(VrtcalInterstitial interstitial, Reason reason) {
    }

    @Override
    public void onAdClicked(VrtcalInterstitial interstitial) {
    }

    @Override
    public void onAdDismissed(VrtcalInterstitial interstitial) {
    }
});
When overriding ad listener methods, you only need to override the ones you are interested in. We recommend that you listen to onAdLoaded() event to know when the ad is ready. For onAdFailedToLoad() callback, the SDK provides a reason that could aid in debugging why an ad request failed.
Load and show interstitial
Displaying an interstitial is a two-step operation: load, and show. Load the interstitial with the following call:
interstitial.loadAd(adUnitId);Ad Unit ID can be obtained by creating an Ad Unit in the SDK Management Section by following the instructions here, then you can use any Ad Unit ID in test mode for testing.
Wait for SDK to call VrtcalInterstitialListener.onAdLoaded(), signifying that the ad is ready to be displayed. Then show the ad by calling:
interstitial.showAd();Destroy interstitial
After an ad is shown and dismissed, the interstitial will destroy itself, so there is no need for the app to destroy it. However, if the app loads an interstitial ad and later decides not to show it, you should destroy it manually with the following:
interstitial.destroy();This will free up all resources used by the interstitial.
Showing Digital Audio (DAAST) Ads
Create digital audio ad
Create a digital audio ad by instantiating a VrtcalDigitalAudio view.
VrtcalDigitalAudio digitalAudio = new VrtcalDigitalAudio(context);Configure digital audio ad
You can listen to ad events by setting ad listener, as follows:
digitalAudio.setAdListener(new VrtcalDigitalAudioListener() {
    @Override
    public void onAdLoaded(VrtcalDigitalAudio vrtcalDigitalAudio) {
    }

    @Override
    public void onAdFailedToLoad(VrtcalDigitalAudio vrtcalDigitalAudio,
	    Reason reason) {
    }

    @Override
    public void onAdStarted(VrtcalDigitalAudio vrtcalDigitalAudio) {
    }

    @Override
    public void onAdFailedToStart(VrtcalDigitalAudio vrtcalDigitalAudio,
	    Reason reason) {
    }

    @Override
    public void onAdClicked(VrtcalDigitalAudio vrtcalDigitalAudio) {
    }

    @Override
    public void onAdAudioStarted(VrtcalDigitalAudio vrtcalDigitalAudio) {
    }

    @Override
    public void onAdAudioCompleted(VrtcalDigitalAudio vrtcalDigitalAudio) {
    }

    @Override
    public void onAdDismissed(VrtcalDigitalAudio vrtcalDigitalAudio) {
    }
});
When overriding ad listener methods, you only need to override the ones you are interested in. We recommend that you listen to onAdLoaded() event to know when the ad is ready. For onAdFailedToLoad() and onAdFailedToStart() callbacks, the SDK provides a reason that could aid in debugging why an ad request failed.
The onAdAudioStarted() and onAdAudioCompleted() callbacks inform you that media has started and ended, respectively. If you have media content in your app, you should pause your media when onAdAudioStarted() is called to avoid conflicts. You can resume playback when onAdAudioCompleted() is invoked. The onAdDismissed() callback indicates that user skipped the ad (only applies to skippable ads). When the ad is skipped, the audio will stop, but the ad view is controlled by the app and will still be visible. It is the app’s responsibility to call destroy() on the ad object and remove the VrtcalDigitalAudio ad view from UI.
Loading digital audio ad
Playing a digital audio ad is a two-step operation: load, and start. Load the digital audio ad with the following call:
digitalAudio.loadAd(adUnitId);Ad Unit ID can be obtained by creating an Ad Unit in the SDK Management Section by following the instructions here, then you can use any Ad Unit ID in test mode for testing.
Starting digital audio ad
Wait for SDK to call VrtcalDigitalAudioListener.onAdLoaded(), signifying that the ad is ready to be displayed. Then start the ad by calling:
digitalAudio.startAd();Adding ad view(320×50) to UI (Optional)
You can optionally add the ad view to the UI instead of having your audio ad play only in the backgroud as it will have a companion banner present, as follows:
ViewGroup adViewContainer = findViewById(R.id.ad_view_container);
adViewContainer.addView(digitalAudio);
NOTE: Digital Audio Ads will ALWAYS have a 320×50 companion banner available for optional use. If the advertiser supplies a companion banner, it will be present. If no advertiser companion banner is supplied, a generic companion banner will be present.
Destroy digital audio ad
The digital audio ad will remain in memory after audio playback completes. This allows the companion ad (if applicable) to remain on UI. It is the app’s responsibility to remove ad views (if previously added) and destroy the ad object when the digital audio ad is no longer needed, as follows:
// Applicable only if you had previously added the digitalAudio ad view
ViewGroup adViewContainer = findViewById(R.id.ad_view_container);
adViewContainer.removeView(digitalAudio);

// Destroy ad object
digitalAudio.destroy();
digitalAudio = null;
SDK Native Ads Integration Guide
Integration Strategy
We support manual integration with raw native ad data. This integration strategy only provides native ad data and does not dictate how the ad is to be displayed, allowing the most flexibility. For example, your app might be a web app, and using this type of integration allows you to display the native ad in HTML format, and not be tied to Android View objects.
Loading Native Ads
Create Native Ad
Create a native ad by instantiating a VrtcalNativeAd object:
VrtcalNativeAd nativeAd = new VrtcalNativeAd(context);Configure Native Ad
You can listen to load ad events by setting load ad listener, as follows:
nativeAd.setLoadListener(new VrtcalNativeLoadListener() {
         @Override
         public void onAdLoaded(VrtcalNativeAd nativeAd) {
         }

         @Override
         pubic void onAdFialuedToLoad(VrtcalNativeAd nativeAd, Reason reason) {
         }
});
When overriding ad listener methods, you only need to override the ones you are interested in. For onAdFailedToLoad() callback, the SDK provides a reason that could aid in debugging why an ad request failed.